How do I insert an overlay scene or B-roll in Wisecut?

Bernardo Cunha
Last Update 3 years ago
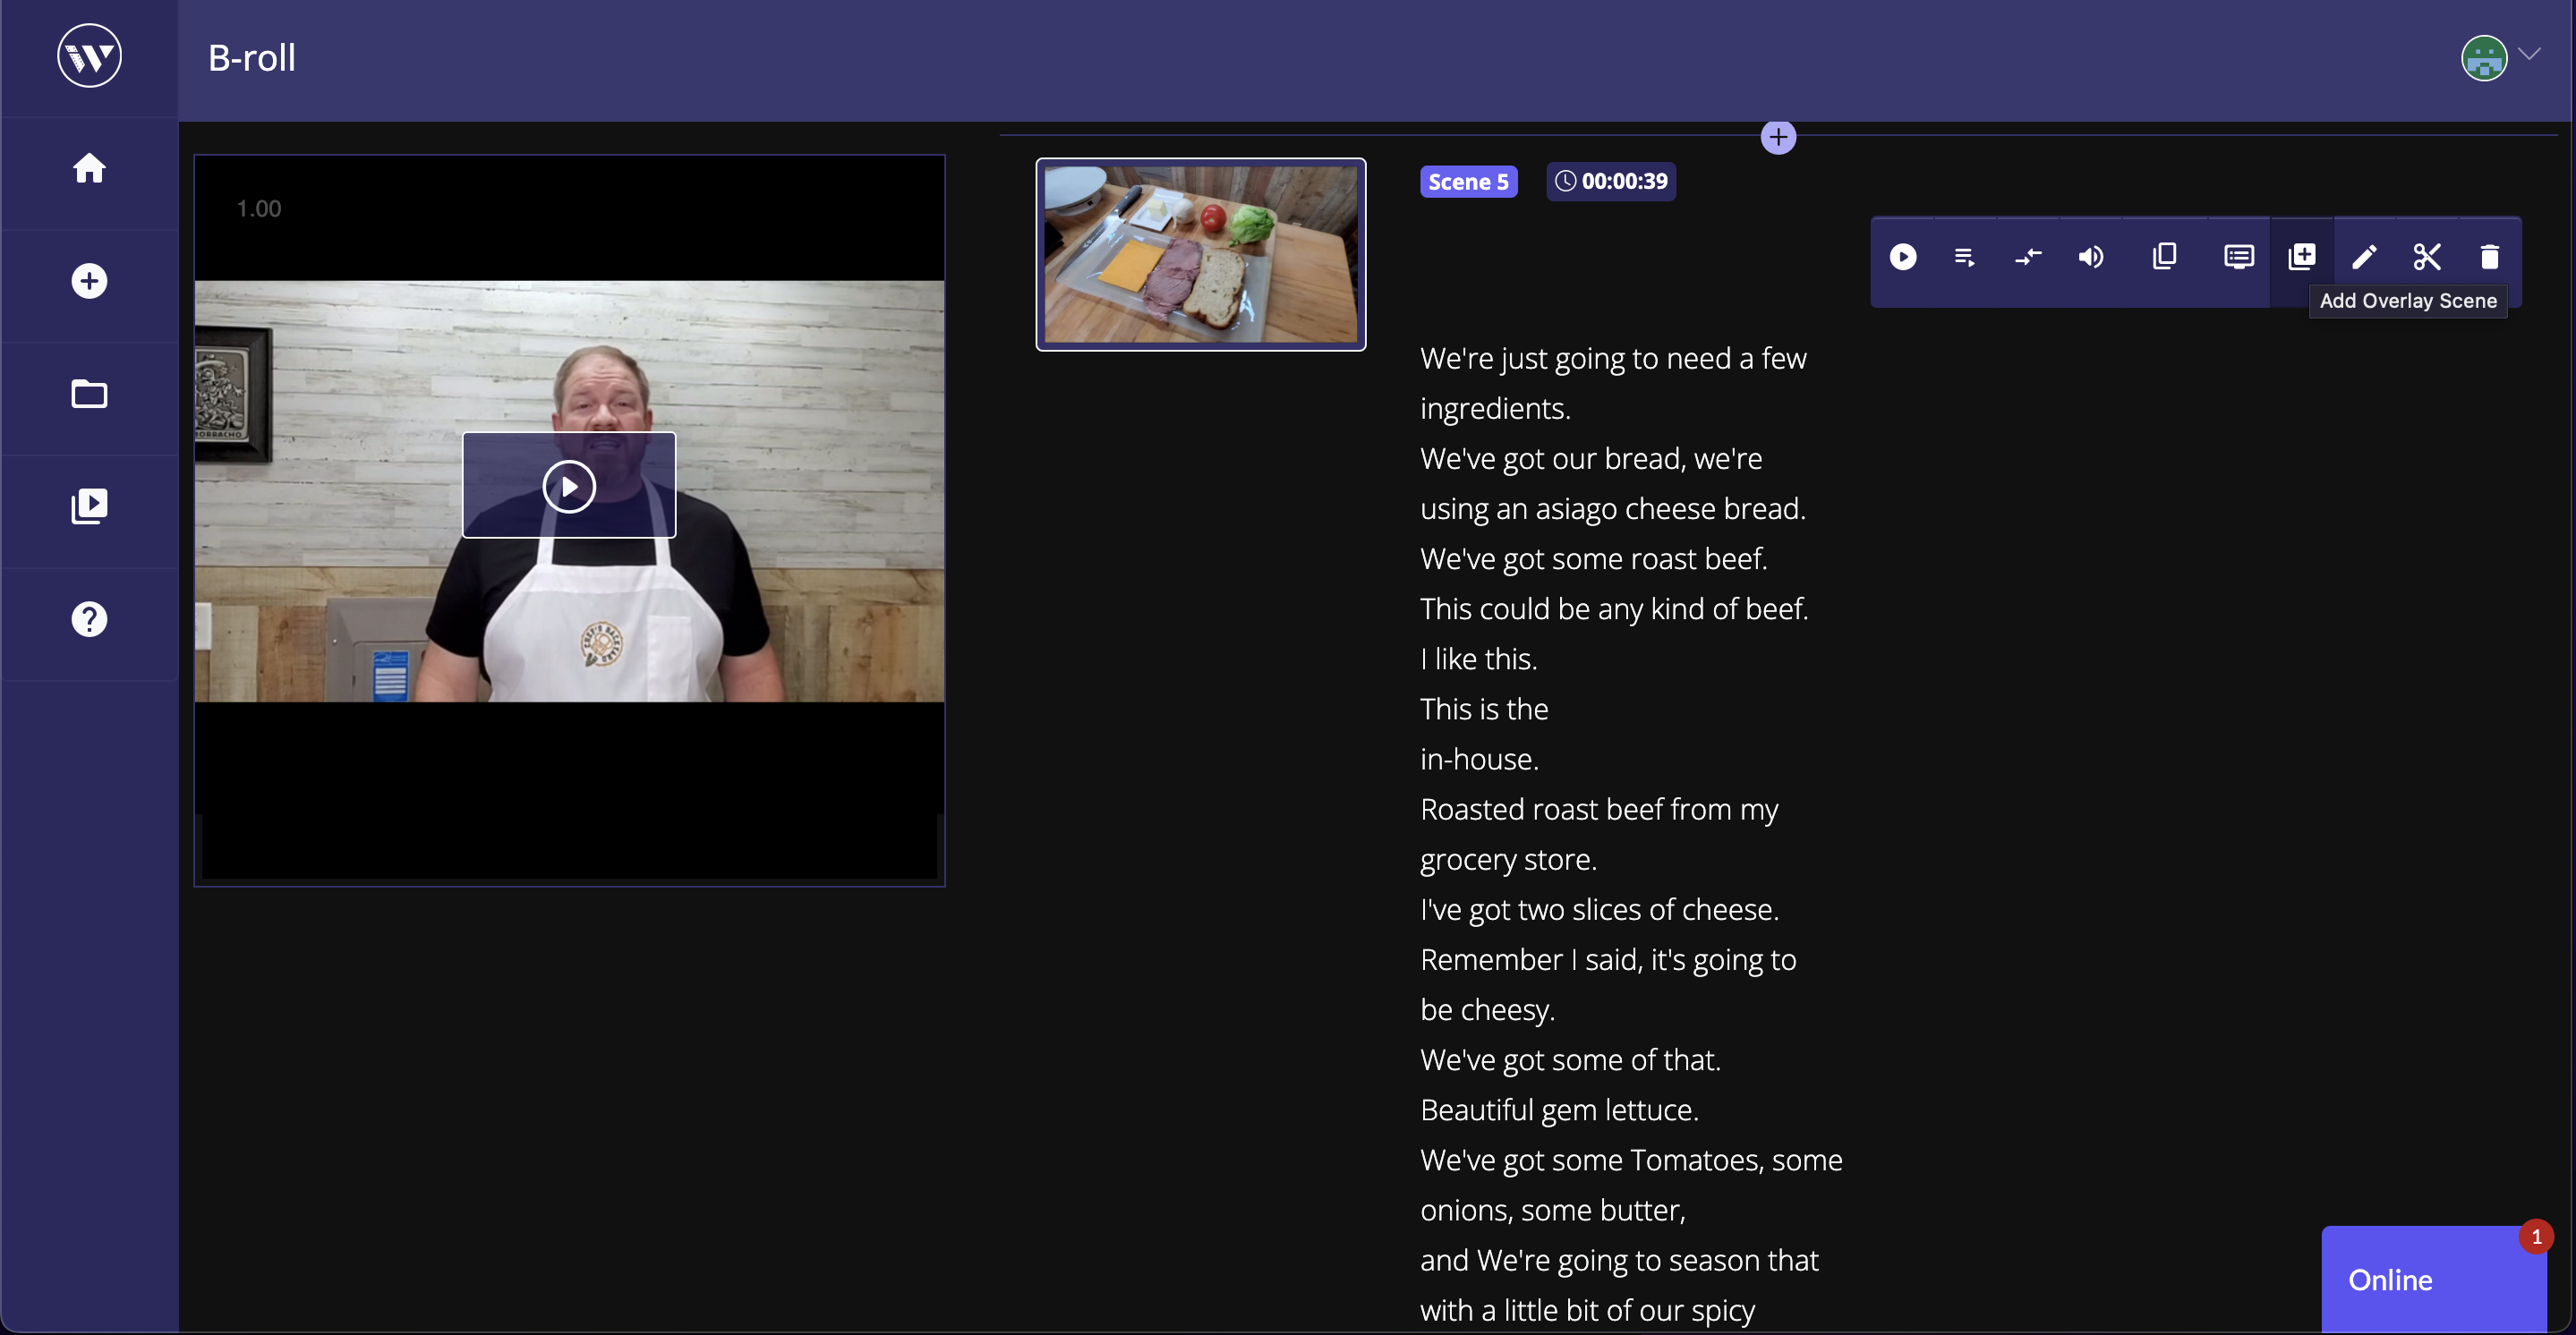
You can insert a B-roll into a specific scene by going to the Storyboard and clicking on the “+” icon to the right of that scene. Then, you’ll see another screen to upload a new video or choose from your Library. After selecting the video, you’ll see both videos in the Storyboard for the same scene.
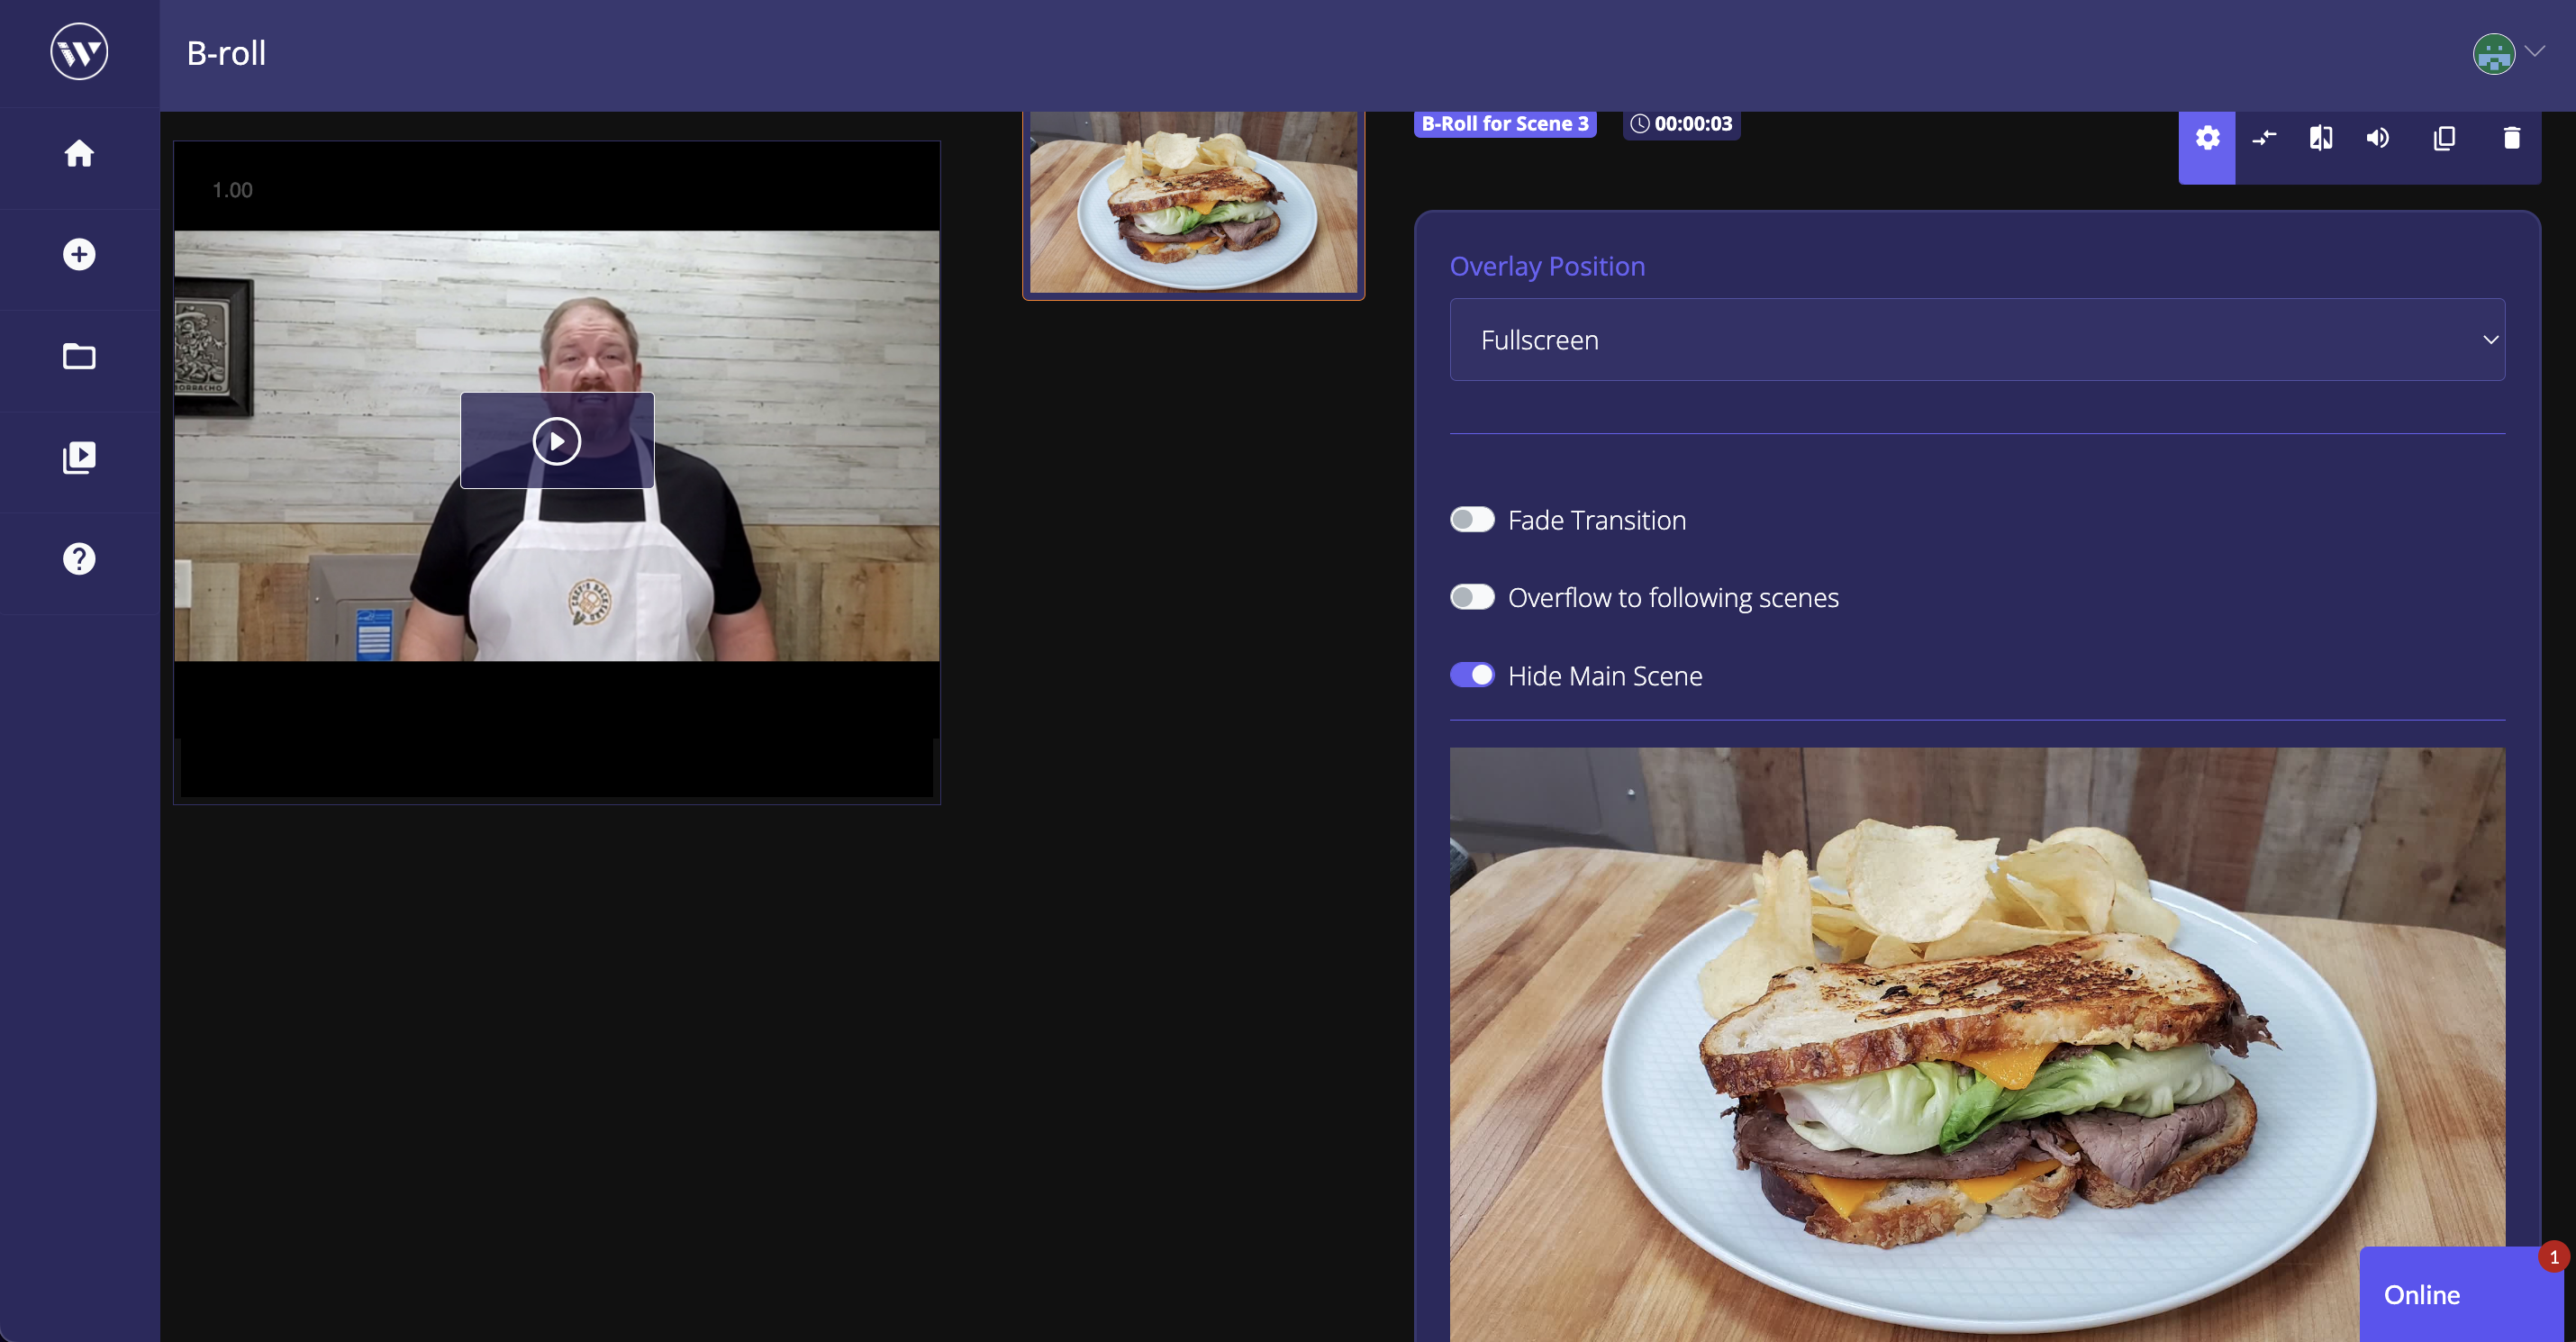
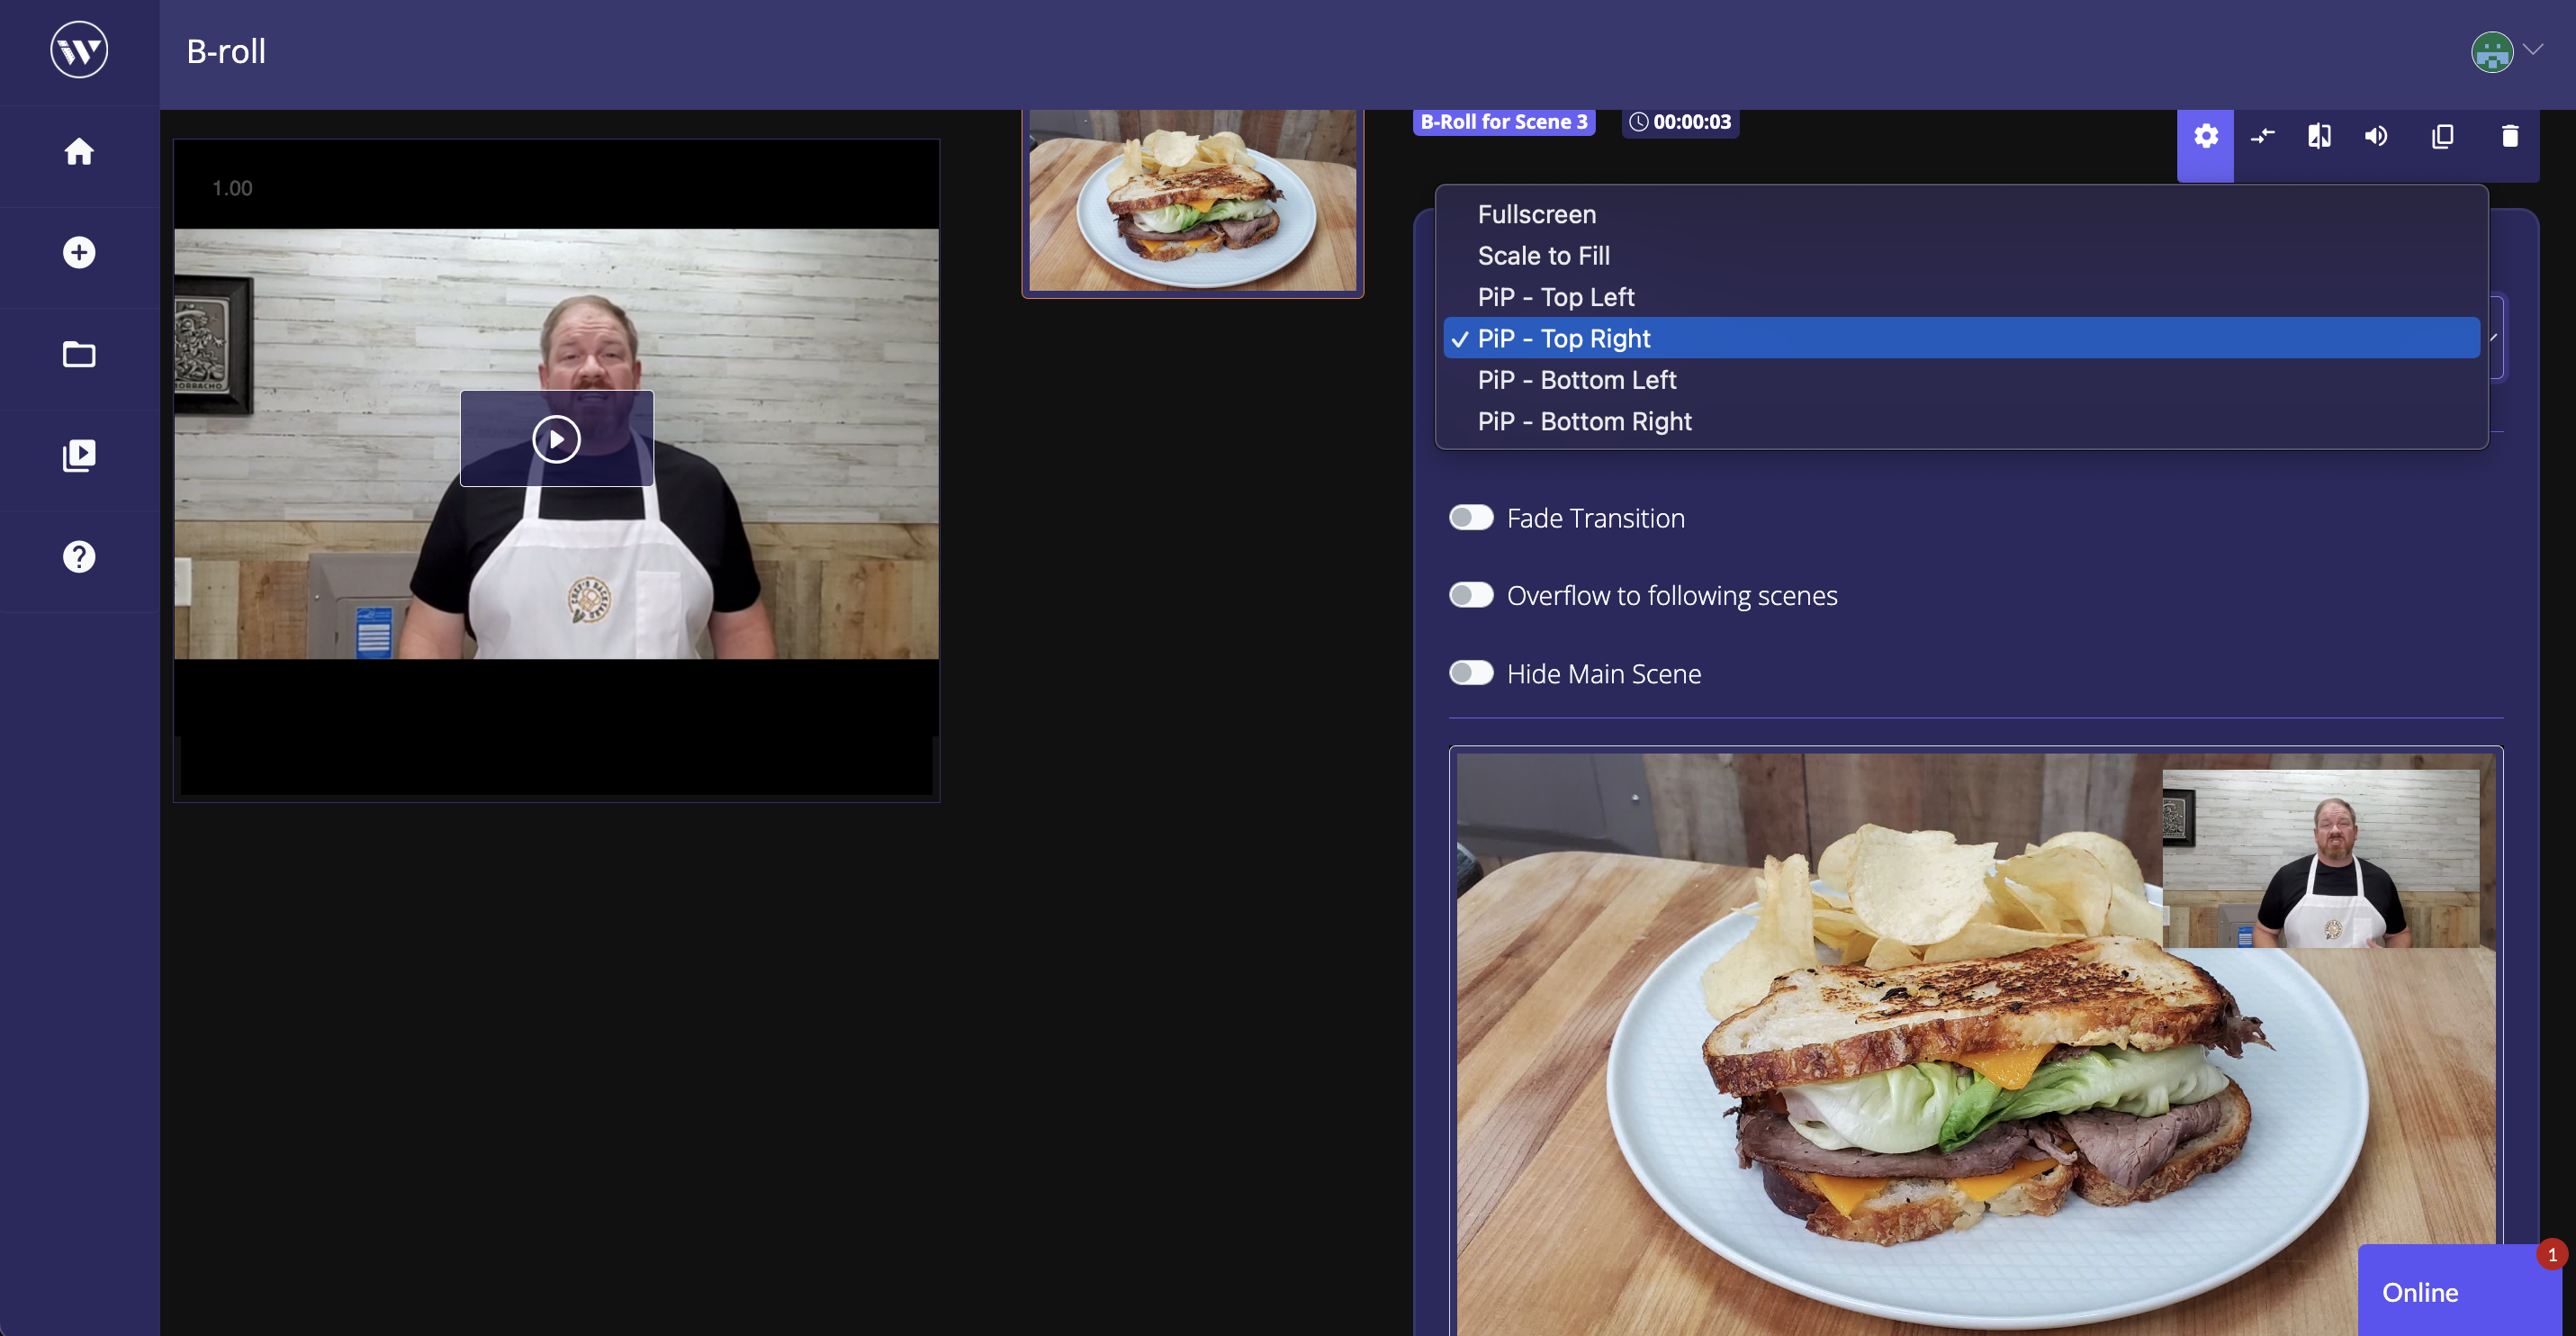
In the settings, you can also change the position of the original scene (Picture-In-Picture): Full Screen, Scale To Fit, Top-Right, Top-Left, Bottom-Right, and Bottom-Left. Choose to apply a Fade-In/Fade-Out effect, and hide the background scene.
If the original scene is shorter than the one you’ve added, your B-roll will be cut when the scene is over. If the B-roll is shorter than the original scene, it will go back to full screen when the B-roll ends. If you want the B-roll to play entirely and overflow the following scenes, you can change it by clicking on the Settings button of the B-roll menu and turning on the “Overflow to Following Scenes” feature. The B-roll will play to its end.
The B-roll menu also allows you to trim, split, duplicate, or change the volume of the B-roll scene.
It’s not possible to have two B-rolls in the same scene, though all the scenes in the project can have a B-roll.